27 Chocolate Candy Tart
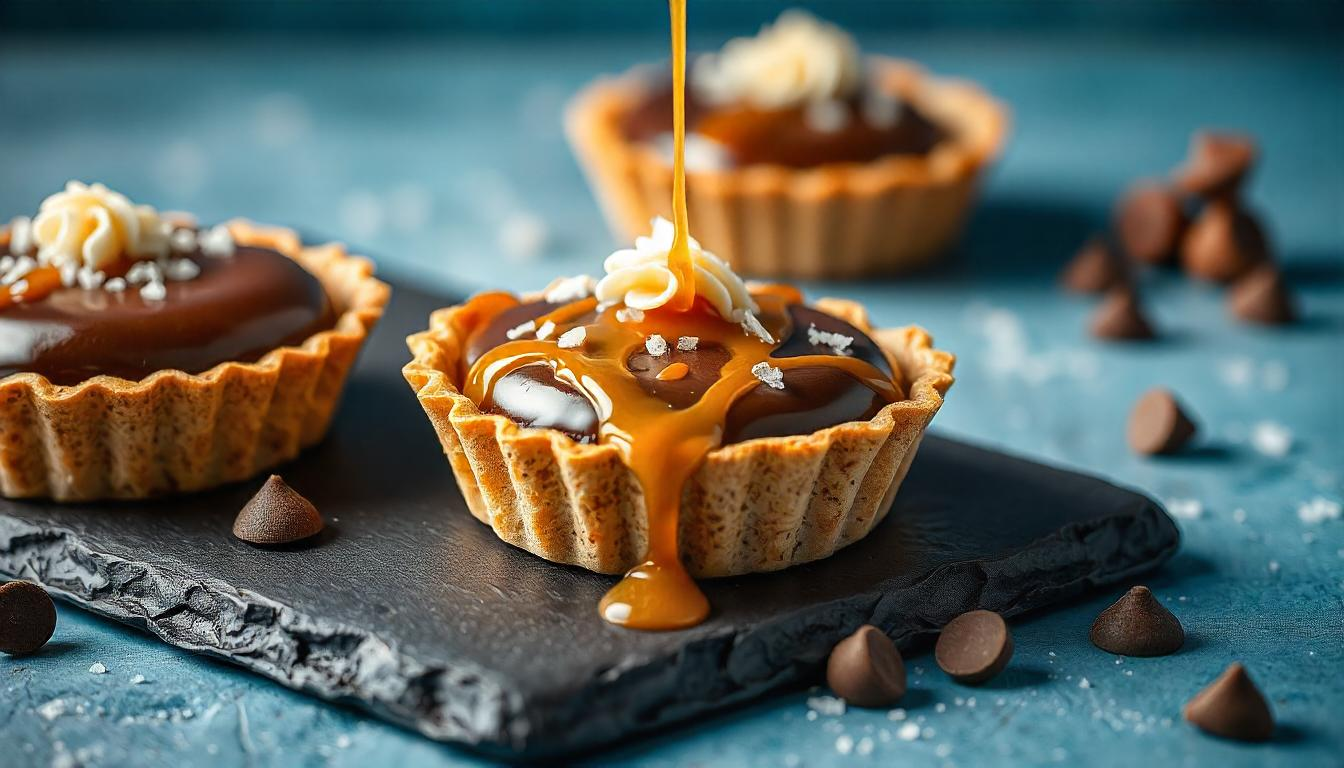
Imagine this: a velvety, rich chocolate filling cradled in a buttery crust, topped with an array of colorful candy that makes your inner child squeal with delight.
That’s the magic of a chocolate candy tart , a dessert that feels like a warm hug and a party in your mouth all at once.
Whether you’re baking for a special occasion or just treating yourself (because why not?), this dessert is a showstopper.
It combines the sophistication of a tart with the playful charm of candy, making it as versatile as it is delicious.
Chocolate candy tarts are more than just a sweet treat—they’re a canvas for creativity.
You can go classic with dark chocolate and peanut butter cups, or get adventurous with white chocolate and gummy bears.
The Science Behind the Perfect Chocolate Tart Base
Let’s start with the foundation of any great tart: the crust.
Think of it as the stage where all the action happens. If the crust isn’t right, even the most luxurious chocolate filling won’t save the day.
A perfect tart crust should be crisp yet tender, with just enough buttery richness to complement the filling without overpowering it.
Achieving this balance requires attention to detail and understanding the science behind the ingredients.
The key players here are flour, butter, sugar, and a pinch of salt. Flour provides structure, but too much gluten development can make the crust tough.
To avoid this, handle the dough as little as possible and use cold butter.
Why cold butter? Because when those tiny pockets of fat melt during baking, they create steam, which gives the crust its flaky texture.
It’s like creating tiny air balloons in your dough—science at its tastiest!
Sugar adds sweetness, but it also helps with browning. A little goes a long way; too much sugar can make the crust overly brittle.
Salt, on the other hand, enhances the overall flavor profile, balancing the sweetness and richness.
Some bakers swear by adding a splash of vinegar or lemon juice to the dough.
This small trick inhibits gluten formation, ensuring your crust stays tender.
Once your dough is mixed, chilling it before rolling is non-negotiable. Chilling firms up the butter, making it easier to roll out without sticking.
Plus, it prevents shrinkage during baking—a common pitfall that can ruin your tart’s shape.
When blind baking (pre-baking the crust), line it with parchment paper and weigh it down with pie weights or dried beans.
This step ensures the crust holds its shape and doesn’t puff up.
Now, here’s a pro tip: brush the baked crust with a thin layer of melted chocolate before adding the filling.
This creates a barrier, preventing the crust from getting soggy. It’s like giving your tart a waterproof jacket—practical and genius.
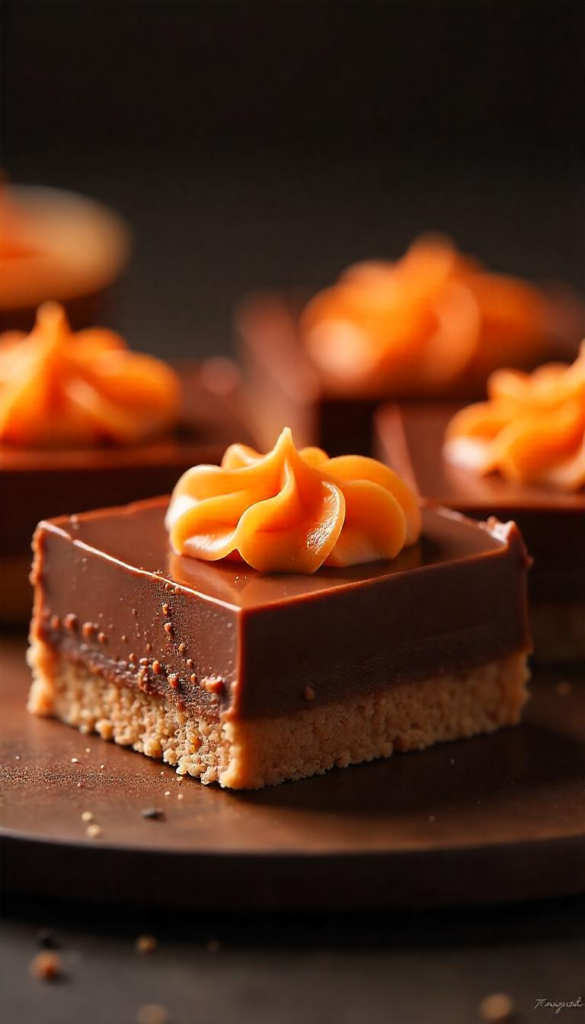
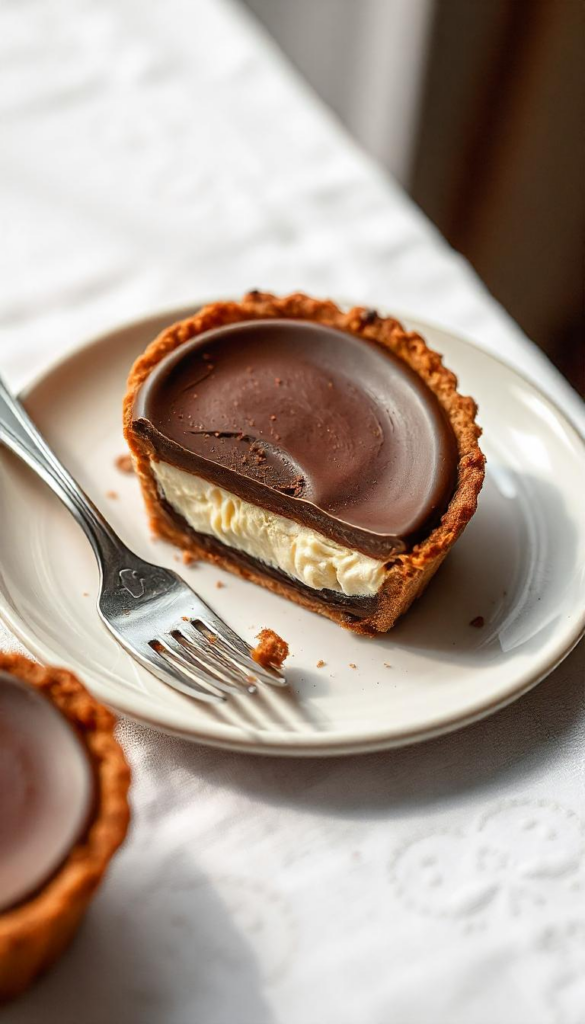
With a solid crust under your belt, you’re ready to move on to the star of the show: the chocolate filling.
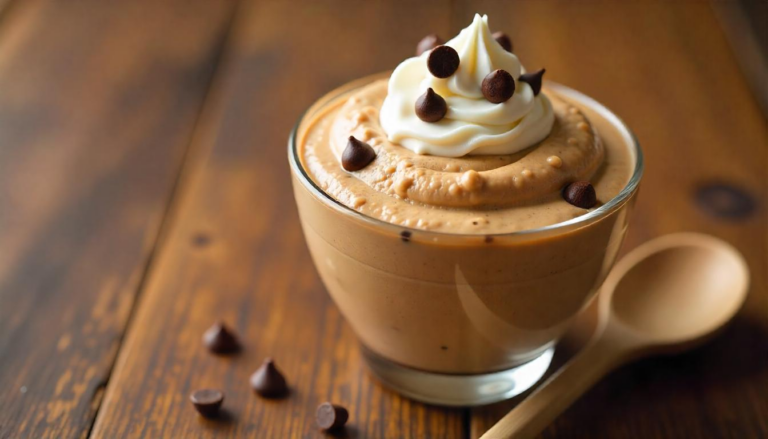
Crafting the Ultimate Chocolate Filling
If the crust is the stage, then the chocolate filling is the headliner—the part everyone’s waiting for.
But not all chocolate fillings are created equal.
To craft one that’s silky, rich, and unforgettable, you need to understand the nuances of chocolate itself and how to work with it.
First things first: choose your chocolate wisely.
Not all chocolates are suited for baking. Look for high-quality couverture chocolate , which contains a higher percentage of cocoa butter.
This gives the filling a smooth, melt-in-your-mouth texture. Dark chocolate (60-70% cocoa) is a classic choice, offering depth and intensity.
Milk chocolate brings sweetness and creaminess, while white chocolate adds a buttery richness.
For a truly indulgent experience, consider combining two types of chocolate—dark and milk, for instance—to create layers of flavor.
The method matters just as much as the ingredient.
One popular technique is the ganache method, where chocolate is melted and combined with warm cream.
The cream not only softens the chocolate but also adds a luxurious creaminess. Here’s how to nail it: chop your chocolate finely to ensure even melting.
Heat the cream until it’s just about to simmer, then pour it over the chocolate. Let it sit for a minute before stirring gently.
This patience allows the chocolate to melt evenly without seizing, which can happen if you stir too soon or use cream that’s too hot.
For an extra touch of elegance, consider infusing the cream with flavors like vanilla, cinnamon, or even a hint of espresso powder.
These additions enhance the chocolate without overpowering it, like adding a sprinkle of fairy dust to an already magical potion.
Just remember to strain the cream before mixing it with the chocolate to remove any solids.
Another option is a custard-based filling, which incorporates eggs for a firmer texture.
This method involves tempering the eggs with warm chocolate mixture to prevent scrambling.
It’s a bit more labor-intensive but results in a filling that’s both creamy and stable—perfect if you’re transporting your tart or serving it at room temperature.
No matter which method you choose, don’t skip the final step: letting the filling set. Chill the tart in the refrigerator for at least a couple of hours.
This allows the flavors to meld and the filling to firm up, ensuring clean slices when you serve it.
Think of it as letting the flavors have a little party before they meet their final audience—you.
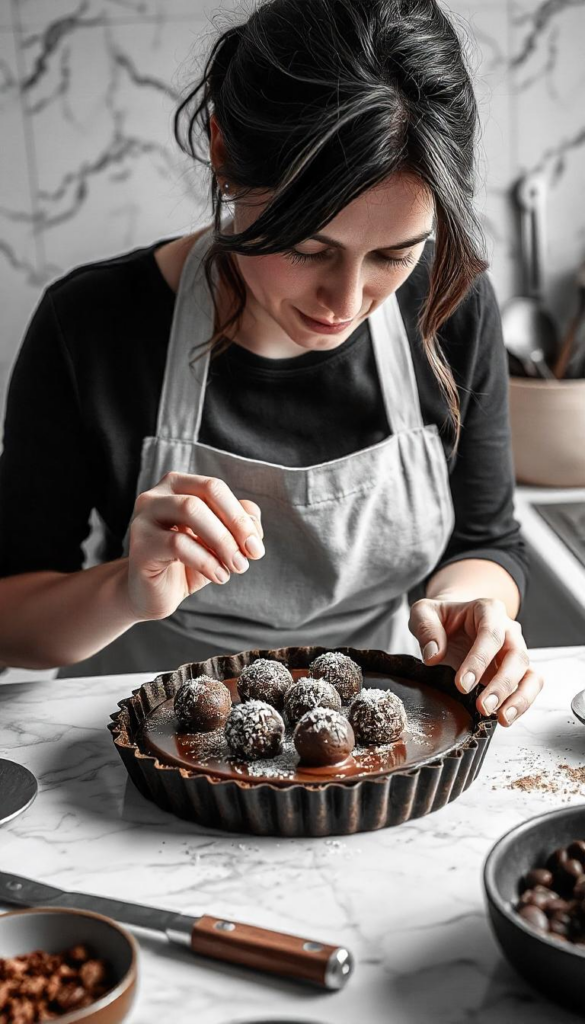
With the filling perfected, it’s time to bring in the fun factor: the candy toppings.
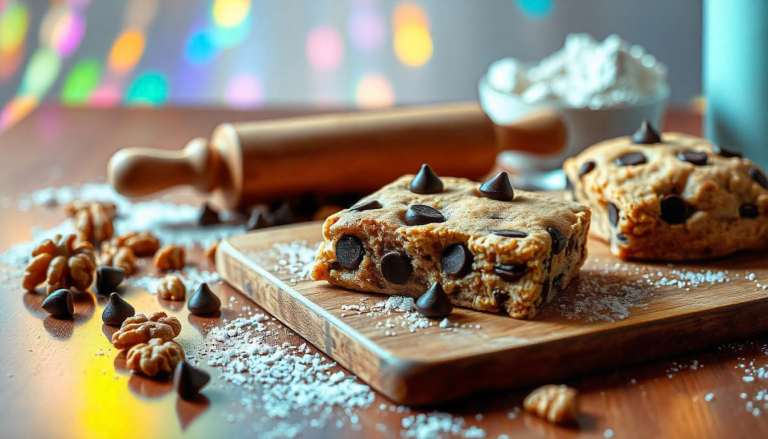
Elevating Your Tart with Creative Candy Toppings
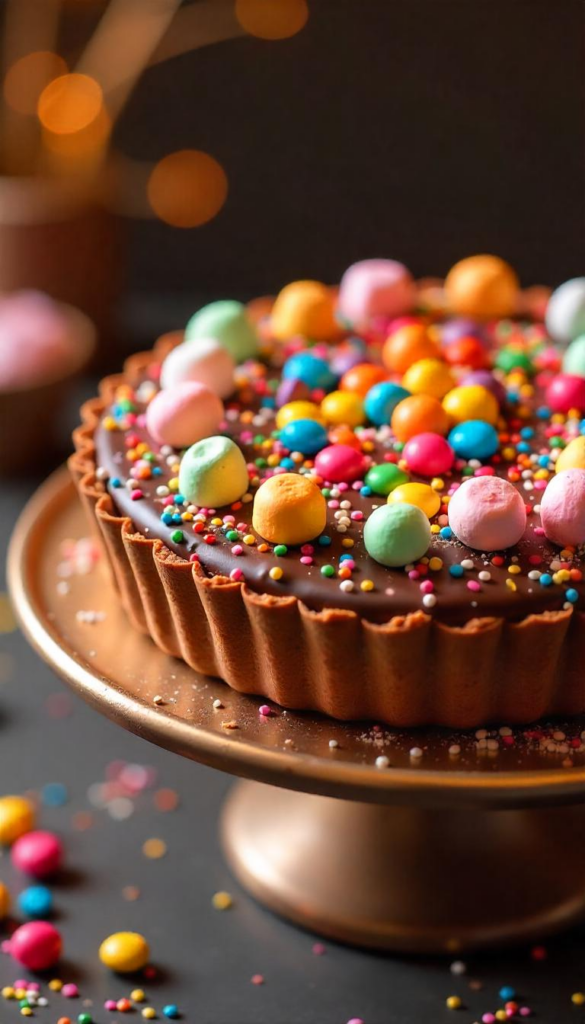
Now comes the part where you get to unleash your inner artist: the candy toppings .
This is where your tart transforms from a simple dessert into a masterpiece of color, texture, and personality.
The right combination of candies can elevate your tart from “delicious” to “Instagram-worthy.”
But don’t just grab whatever’s in your pantry—choose your toppings thoughtfully to complement the chocolate filling and create a balanced experience.
Start by considering the flavor profiles. If your filling is rich and dark, opt for candies that add brightness and contrast.
Think tangy citrus gummies, crunchy peanut butter cups, or salty pretzel pieces.
On the other hand, if you’ve gone with a sweeter milk chocolate or white chocolate filling, balance it out with something tart or bitter, like sour patch kids or dark chocolate chunks.
It’s like pairing wine with food—complementary flavors make each bite more exciting.
Texture is equally important.
A smooth, creamy filling begs for some crunch. Crushed cookies, caramel popcorn, or even toasted nuts can add that satisfying textural contrast.
Imagine biting into a velvety chocolate filling and being greeted by a burst of crunch—it’s like fireworks in your mouth.
And don’t forget about visual appeal! Arrange your candies in patterns or clusters to create a sense of whimsy.
Striped candies, round chocolates, and geometric shapes can turn your tart into a kaleidoscope of fun.
Here’s a personal anecdote: I once made a tart for a friend’s birthday and decided to theme it around her favorite childhood candies.
I used mini marshmallows, rainbow sprinkles, and crushed peppermint sticks.
Not only did it taste amazing, but it also brought back memories of her childhood summers. She said it felt like a hug from her younger self.
That’s the power of thoughtful candy choices—they evoke emotions and create connections.
If you’re feeling adventurous, try incorporating unexpected elements.
Candied ginger adds a spicy kick, while freeze-dried fruit brings a concentrated burst of flavor.
Even savory elements like sea salt flakes can work wonders, cutting through the sweetness and adding complexity. Just remember: moderation is key.
Too many toppings can overwhelm the tart, turning it into a chaotic jumble of flavors and textures.
Finally, consider the presentation.
Drizzle some melted chocolate over the candies for a glossy finish, or dust the edges with powdered sugar for a touch of elegance.
It’s the little details that make your tart stand out, like accessorizing an outfit with the perfect necklace.
With your toppings in place, let’s talk about how to serve this show-stopping dessert.
Serving and Storing Your Chocolate Candy Tart

You’ve put in the work, and now it’s time to enjoy the fruits of your labor.
But before you dive in, let’s talk about how to serve and store your chocolate candy tart to ensure it stays as fresh and delicious as the moment you finished decorating it.
When it comes to serving, timing is everything.
If your tart has been chilling in the fridge, take it out about 15-20 minutes before slicing.
This allows the chocolate filling to soften slightly, making it easier to cut clean slices.
Use a sharp knife dipped in hot water and wiped dry between cuts for the neatest presentation.
Think of it as sharpening your sword before battle—precision matters.
Pair your tart with a dollop of whipped cream or a scoop of vanilla ice cream for an extra indulgent experience.
The cold creaminess contrasts beautifully with the rich chocolate, creating a symphony of textures and temperatures.
Now, let’s address storage. Chocolate candy tarts are best enjoyed fresh, but they can last a few days if stored properly.
Keep it in an airtight container in the refrigerator to prevent the crust from absorbing moisture and becoming soggy.
If you’ve used candies that might lose their crunch (like pretzels or cookies), consider adding them just before serving to maintain their texture.
Pro tip: place a piece of parchment paper between layers if you’re stacking slices to avoid smudging the toppings.
If you’re planning ahead, the components of the tart can be made in stages.
The crust can be baked and frozen for up to a month, while the filling can be prepared a day in advance and stored in the fridge.
Assemble everything on the day of serving for maximum freshness.
It’s like prepping ingredients for a big dinner party—you want everything to come together seamlessly at the last minute.
And here’s a fun idea: turn your tart into individual servings by using mini tart pans.
Not only does this make portion control easier, but it also adds a touch of elegance to your presentation.
Plus, everyone gets their own little dessert masterpiece—no fighting over the biggest slice!
By following these tips, you’ll ensure your tart remains as delightful on day two as it was on day one. Now, let’s wrap things up with some final thoughts.
Final Thoughts: Your Chocolate Candy Tart Adventure Awaits
Creating a chocolate candy tart is more than just baking—it’s an experience.
From the buttery crust to the velvety filling and the playful toppings, every step is an opportunity to express your creativity and indulge your senses.
Whether you’re a seasoned baker or a curious beginner, this dessert offers something for everyone.
It’s forgiving enough for experimentation yet rewarding enough to feel like a true accomplishment.
So, what are you waiting for? Gather your ingredients, roll up your sleeves, and let your imagination run wild.
Remember, there’s no right or wrong way to make this tart—only your way.
Maybe you’ll discover a new favorite candy combination or invent a topping trend that takes the dessert world by storm.
After all, every great recipe starts with a little curiosity and a lot of chocolate.
Happy baking, and may your tart be as sweet as the memories it creates!